
RV Retirement – How Much Did We Spend for Food, Fuel, and Campground Fees in 2024?
"We like looking at freedom!"
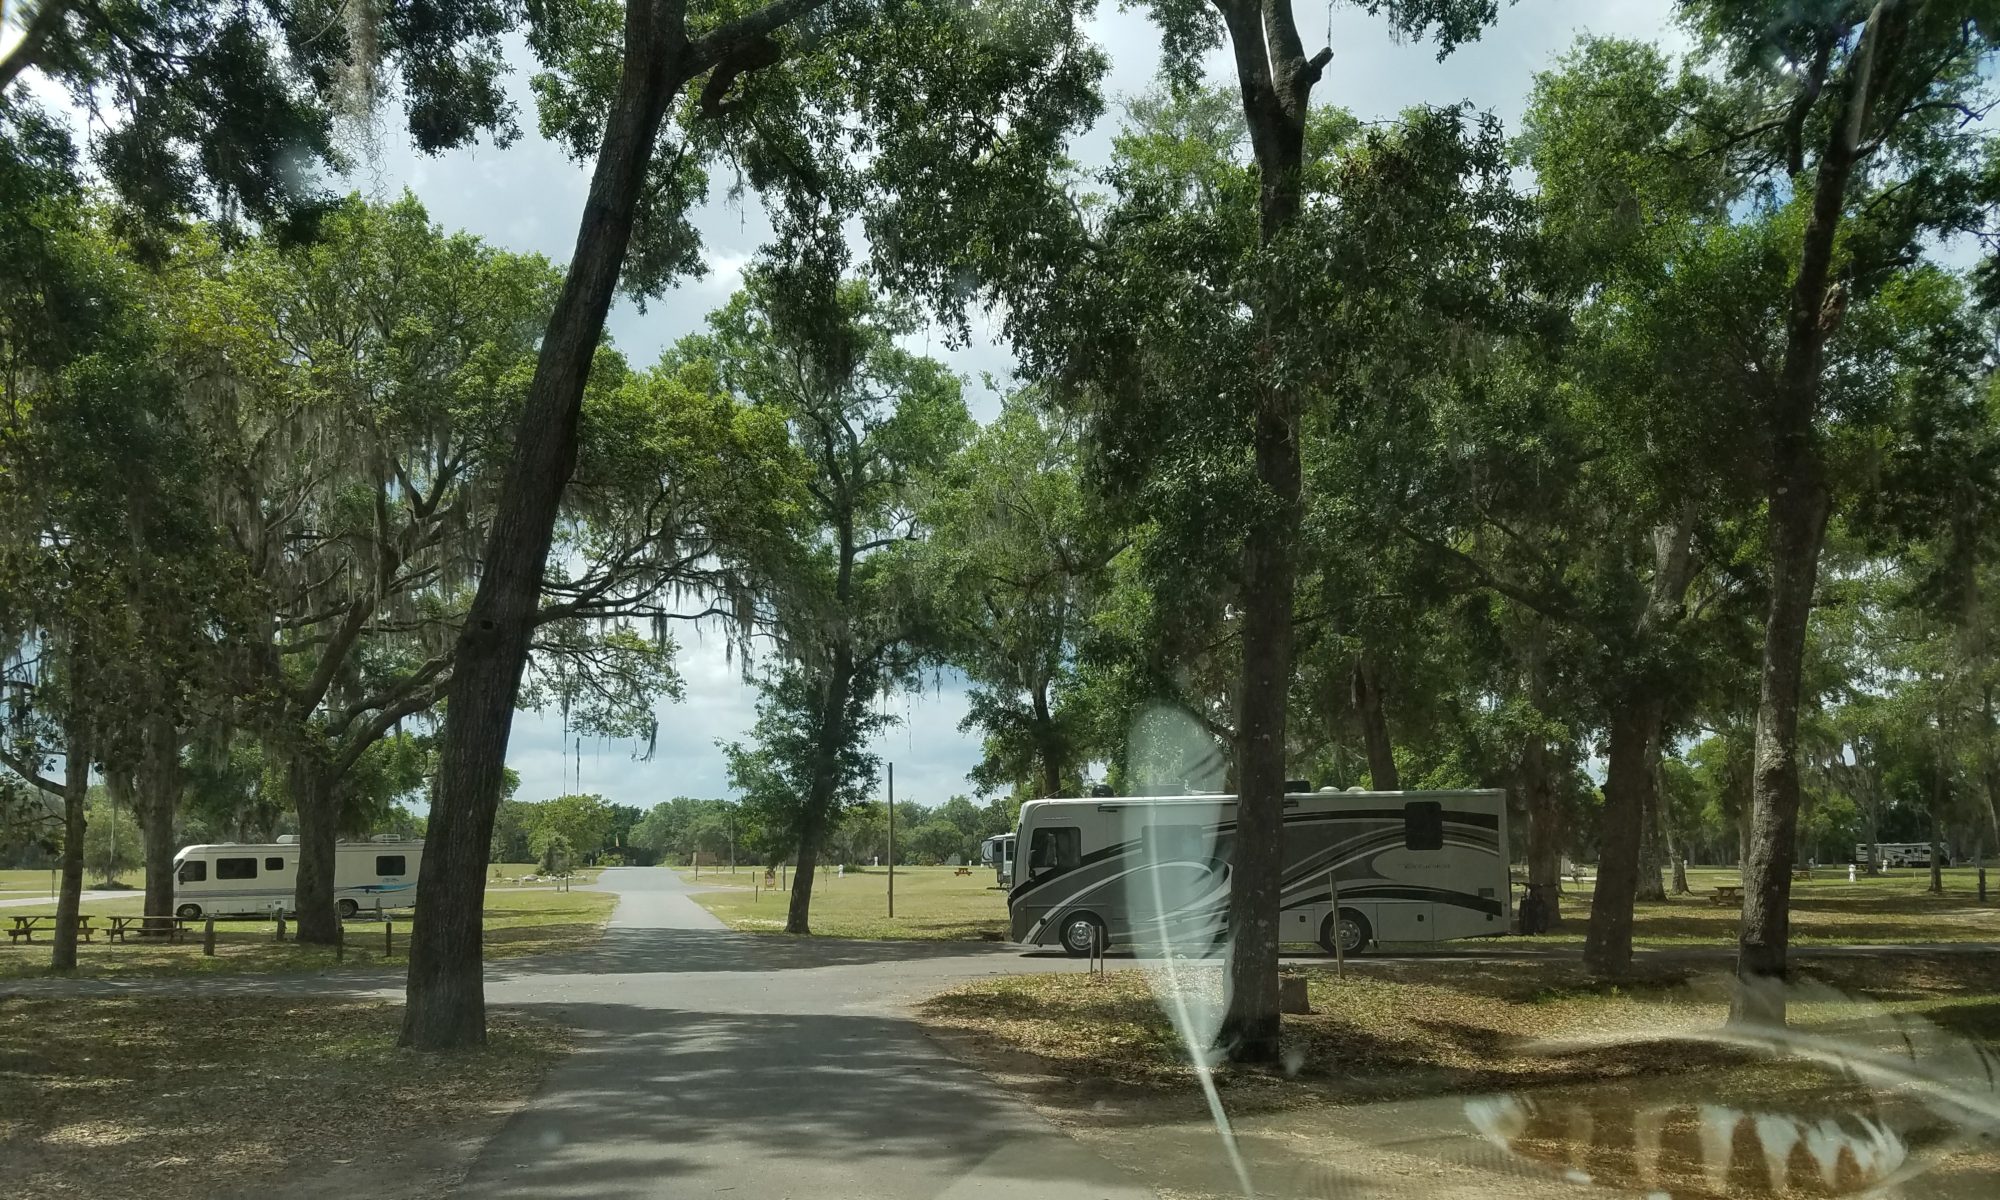
Trinidad Lake State Park is a Colorado State Park located in Trinidad, Colorado. What a scenic park! We loved our short stay here.
*Heads Up! Colorado State Parks charge a daily fee in addition to camping fees. At this park the cost is $9.00 per day.
There is also the South Shore Campground which has 10 non-electric sites. This campground is within walking distance to the lake.
What we love about Trinidad Lake State Park:
What we didn’t love about Trinidad Lake State Park:
Trinidad Lake State Park is worth a stop if you are traveling along the I -25 corridor in southern Colorado. We’re glad we booked there!
Just off of I90 in Washington, near the town of Burbank, is a US Army Corps of Engineers park called Hood Park. Hood Park is located on the shores of Lake Wallula and the Snake River which flows into the Columbia River.
Fun fact: Lewis and Clark camped near here where the Snake River flows into the Columbia River. You can visit this location which is now Sacajawea State Park.
Hood Park is a picture perfect park like setting with sprawling shade trees and lush green grass. Even though it is a larger campground with 67 campsites, each site is spacious with plenty of room between sites. All sites provide a view of the water. The park has electric hook-ups but you will need to use your on board water. There are many water faucets around the campground to fill jugs and you can fill your tank with fresh water at the dump station.
Boating Swimming Fishing Bike Trail nearby! We enjoyed kayaking these waters.

Dog Walking Report: Park roads and walking trails around fishing ponds provide ample room to walk dogs.
Verizon works great at Hood Park. We only use Verizon, but according to Trip Wizard reviews, T Mobile, Sprint, and ATT also work here.
We are gradually making our way from Oregon back to Florida. You can check out our trip to Oregon from Florida on our channel playlist, Full Time RV Life- Campgrounds from Florida to Oregon: https://www.youtube.com/watch?v=RwigIQJQWqc&list=PLm8lskmqAcnMNY1zzxKNXYHmIgpLbeQAR
Our last stop was LePage Park in Oregon. https://ruffroadrvlife.com/oregon-camping-lepage-park/
We enjoyed five days at Hood Park before hitting the road and heading to Idaho. After a peek at Idaho, we are on to Montana, and South Dakota. Our route will then take a dive south. Stay tuned for more reviews, full time RV life tips, and adventures.
Our names are Gary and Sharon. We live and travel full time in our RV, Ruff Road, with our two half husky sisters, Terra and Luna. We share lessons learned, places we’ve visited, and provide videos and pictures of campgrounds in our Ruff Road Reviews. Subscribe to follow the journey. You can follow us on our You Tube channel, Facebook and Instagram.
https://www.youtube.com/channel/UCHRpIFHJItKn3X_7DKY77Mw?view_as=subscriber
https://www.facebook.com/pg/Ruff-Road-RV-Life-775489835979588/posts/
https://www.instagram.com/ruff_road_rv_life/
“We like looking at freedom!” Safe travels!

I am a list person but this one was overwhelming! Our TO DO list for full-time RV Life really began when we made the decision to travel and live in an RV full- time. That was about two years ago! We have been living in our RV, Ruff Road, for over a year at this time. Our plans were to be in travel mode before now, but circumstances and my Appalachian Trail hike delayed our launch. We did go on a few camping trips to get our travel feet wet and of course, living in Ruff Road everyday allowed us to get to know the ins and outs of RV living.
So my one piece of advice if you decide to become a full-time RV dweller and before you make your own TO DO list for full-time RV life is to be flexible. There were circumstances beyond our control that required us to delay our plans. That’s ok. We have lived happily as stationary full-time RVers. We are looking forward to finally “hitting the road.”
This list will include our final TO DOs. Our process for stocking, and moving in to Ruff Road can be found in our previous posts. In addition, see our previous posts for our downsizing experience. https://ruffroadrvlife.com/the-move-downsizing-and-moving-in-three-weeks/
Well, I’m happy to say that most items have been checked completed. We still had a few weeks to go at this point. This list is not a comprehensive list of all we’ve done. However, it includes the things that we needed to purchase and/or to do before we begin our full-time RV travel life. In addition, it includes items that we didn’t even think about initially such as check bank cards.
We hope this last minute list helps others beginning their journey. Follow us on our journey here and on our You Tube channel Ruff Road RV Life: https://www.youtube.com/channel/UCHRpIFHJItKn3X_7DKY77Mw/videos?view_as=subscriber

We are moving forward with our plan to “hit the road” soon. One important task for motorhome owners is to determine how to tow a vehicle with their RV. That was a biggy on our TO DO list in terms of cost and decision making. We learned about different methods to tow our car. Then, we made our choice and began the process.
Ruff Road is a class A motorhome and we wanted a second vehicle for our journey. We have taken trips without a towed vehicle and in some locations that worked out okay, however as full timers we want the flexibility of a smaller vehicle to run errands, get to trailheads, sightsee, and of course to transport our toys.
We have heard of others who found that renting or ubering when they arrive at their destinations is more cost effective since you don’t always need a second vehicle. That is an option to research or consider if you are traveling in a motorhome. We have not tried that and with our two lovely shedding 55 pound dogs, I don’t think it’s even an option. Yes, we have the extra maintenance and the insurance on this towed, however the benefits for us outweigh these factors. So, we dived into how to tow our vehicle with our RV.
There are four ways to take a second car with you while traveling in a motorhome. We explored each method when deciding how to tow our vehicle with our RV. However, the first method doesn’t involve towing at all.
Deciding how we would tow our vehicle with our RV was the first step. Then we purchased the equipment and made a date to install it. We “did it ourselves” or rather Gary and our son-in-law did it themselves. They installed the baseplate on our Acura MDX so we can connect it to our Falcon All Terrain non-binding tow bar. The install took about four hours and since they did the job we saved approximately $1,200.
I’ll admit that it was scary as Gary sent me pictures throughout the morning of our car in parts. However, it all hooked up fine except there were more than three inches from the center of the RV hitch receiver to the center of the base pin on the baseplate. This meant we had to purchase a high- low hitch adapter to ensure we were towing safely and to not void our warranty. Our next step is to tow our car to the dump station next week.
How do you tow your vehicle with your RV? Share any lessons learned or tips in the comment section. We’d love to learn from others. Our decision is based on our situation and of course, your decision on how to tow your vehicle with your RV will be based on your specific situation and your needs.
This brings us one step closer to finally “hitting the road”. If you want to see that baseplate install, check it out on our You Tube Channel, Ruff Road RV Life. https://www.youtube.com/watch?v=tpyvKQkis74&t=18s
Learn about us, who we are and why we are full time RVers. https://ruffroadrvlife.com/
If you want to follow our adventures in full time RV life with dogs, subscribe and click notifications. We will be posting more content as we become more mobile. https://www.youtube.com/channel/UCHRpIFHJItKn3X_7DKY77Mw?view_as=subscriber
Check out our latest video, Fun With Fuses! We are excited that we solved three electrical issues in Ruff Road. We became more knowledgable and saved money by solving these issues ourselves. https://youtu.be/qJrbbYTsexM
We shared how we recently went through Ruff Road evaluating our space, purging and reorganizing. https://ruffroadrvlife.com/together-again-and-one-year-purge-a-versary/
Follow the link below to our You Tube channel, Ruff Road RV Life, to hear what we did to purge and reorganize our RV.
https://www.youtube.com/watch?v=jMJF0T7fsbU

Together again! I’m home after 600 Appalachian Trail miles. I have 278 miles to complete the entire trail. It’s been a great journey but I really missed Gary, the pups, family, and my cozy Ruff Road bed. It’s good to be home. If you want to check out my Appalachian Trail Journey, go to Trail Gator Trail Tales on YOU TUBE: https://www.youtube.com/watch?v=NDhM9jZwVlQ

We have a list as we begin our plans to officially hit the road. We have been living in Ruff Road for a year and three months now. Our plan was to be on the road by now but with my hiking, hiking injury delay and other obligations we are still living at home base in Florida. We will be wintering here as we complete final tasks necessary before hitting the road. We will be sharing our prep list in the next post since it will include things we’ve done to date to prepare and our final TO DOs.
Our major TO DO for this week was to purge and reorganize inside cabinets and outside storage bays. My post from April stated: “They say if you haven’t used it in a year, it has to go. I think in a small space like an RV you need to assess the clutter more frequently.” This is definitely true since we have had more than one purge and organize in a year’s time. This time was more thorough for cabinets in the front of the coach. since kitchen and bedroom areas have been thoroughly reworked in recent months.
We threw away five bags of trash- mostly from the inside of the RV which included outdated and unnecessary paperwork. I know that’s a lot! I couldn’t believe it myself but when we moved in it was quick so some notebooks or folders were stored without a close review of contents. For example, our notebook containing product manuals contained a few manuals of items we no longer owned. Our outside purge yielded one large trash bag full of items not suitable for donation. In addition, we filled one tote of items for donation. This included those items that we thought we needed but never used.
The biggest accomplishment from our reorganizing this time was better utilization of space. For example, when we moved in we planned to group like items together. When that space was filled, we plugged in excess items as logical as we could but still had like items in two places. Also, we have learned over the course of a year, which items we used most frequently and moved them to the easiest accessible bay. We started out with what we “thought” would be important in grouping items and what to keep. However, as we put that into practice we learned that changes were necessary based on day to day reality. We realize that as time goes by, we will revisit our newly reorganized areas and go through the process again…and again…and again. That’s ok. That’s RV living.

Purging is like losing weight. It can be hard to do. It is easy to creep back on you. However, when you lose it or purge it, you do feel better.
TO DOs for Hitting the Road
What did Gary do while I was away for months hiking the Appalachian Trail and hanging out in Colorado?